Tuesday, January 31, 2012

Cori Derksen's photo class

On Saturday I went to an all day photography class with the amazing Cori Derksen. I admire her work so much. She is extremely talented! A group of six women met at her house Saturday to learn how to take our camera's off the little automatic button and actually change some settings, and use manual. What do you know, your pictures turn out so much more life-like and beautiful. I was even extra lucky to take pictures of my friends children to practice. Thank you to Cori for taking time to teach me and open up a whole new world. You were so patient and caring to share your expertise. Also thank you to The Patricios, and The DeManby's for letting us practice on your beautiful children. I took a million pictures but here's a couple. It was such a fun day. Check out these cute kids!

Carter Stephen Patricio


Logan & Luke DeManby


Thursday, January 26, 2012

Style Files: Peachy Stripes

I've decided I'm young, love fashion, and need to branch out and have a little more fun. So as I read fashion blogs and love all the gorgeous shoots, and designer clothing I felt inspired to document some everyday clothes I wear (that are far from designer or professional shoots) but are me! So here we go! I LOVE color in all areas of my life so I'm sure you'll see a lot of that and my gorgeous Stella & Dot pieces that I'm sure will be worn a ton too. I hope you enjoy, feel free to comment, the hubs has already shared his distaste for my hat, which makes me want to wear it more : )


Hat: Target (on sale right now)
Necklace: Stella & Dot Campari
Shirt: Khloe California
Skirt: Urban Outfitters
Tights: Nordstrom
Boots: Steve Madden

Wednesday, January 25, 2012

Thrifting revealed!

Here are my first two thrifting projects from this past weekend. More to come on the ladder and mini tables, but I'm in the love with my giant chalkboard and two lamps. I am going a little crazy with the chevron over here (more of that later). My obsession began over a year ago with my guest room and now its seeping into the living room. So pleased with how our little revamp is coming together!

Before: Picture Frame

Strip it apart & sprayed the frame

Chalkboard painted the picture

After: Chalkboard ready for all holidays

 Vintage lamp bases before

Spray them Tiffany blue


Add Chevron lamp shade


love these beauties, still working on where they are going to "live"

Thanks for stopping by!

Linking up at:

Tuesday, January 24, 2012

Thrifting

On this rainy weekend Aaron and I went out searching for some lamp bases and a picture frame for a few projects I had in mind and came home with a few more goodies from the Tower District...

for $2.99 each

$7 dollars each

latter for $9.99

Picture frame was a Home Goods find for $19.99

They are all in need of some TLC. I'm working on them. Lamps will be revealed tomorrow!


Wednesday, January 18, 2012

Playing around

I decided it's time to start putting my camera on manual and attempting to take better pictures. Here is day one. Don't laugh, my first subject was my dog Dolce. It's a starting point : )

She's glowing

Passed the camera 

Friday, January 13, 2012

Entryway Cut Out

Disclaimer: Prepare yourselves for lots of pictures of my husbands behind in this post. He worked hard to build this project for me.

We did this project last summer because our entry way cut-out had been empty for too long.  It is such a large space that we had a hard time trying to figure out what we wanted there. We finally found an adorable huge picture at Pier One, and got home to see that it was still not big enough so this is where the project began.


Before: The blank cut out (with a few of Aaron's tools)

We started by going to the hardware store to get two pieces of crown molding to begin our frame. 

In the garage Aaron cut the edges at an angle with a miter box

Then we used wood glue and brackets to keep the four corners together (this required team work)

Preview to see if it fits right before painting it black

Let it dry for the night

Prepping the risky climb to the top. To make sure the frame would be set so Aaron could nail it in quickly once up in the cut-out, we used industrial velcro on the back of the frame to hold it in place temporarily.

I braced the bottom of the ladder and up he went. * A little to the left, and little to the right! Ok stick it on!

Then he drilled it in so we knew it wasn't going anywhere

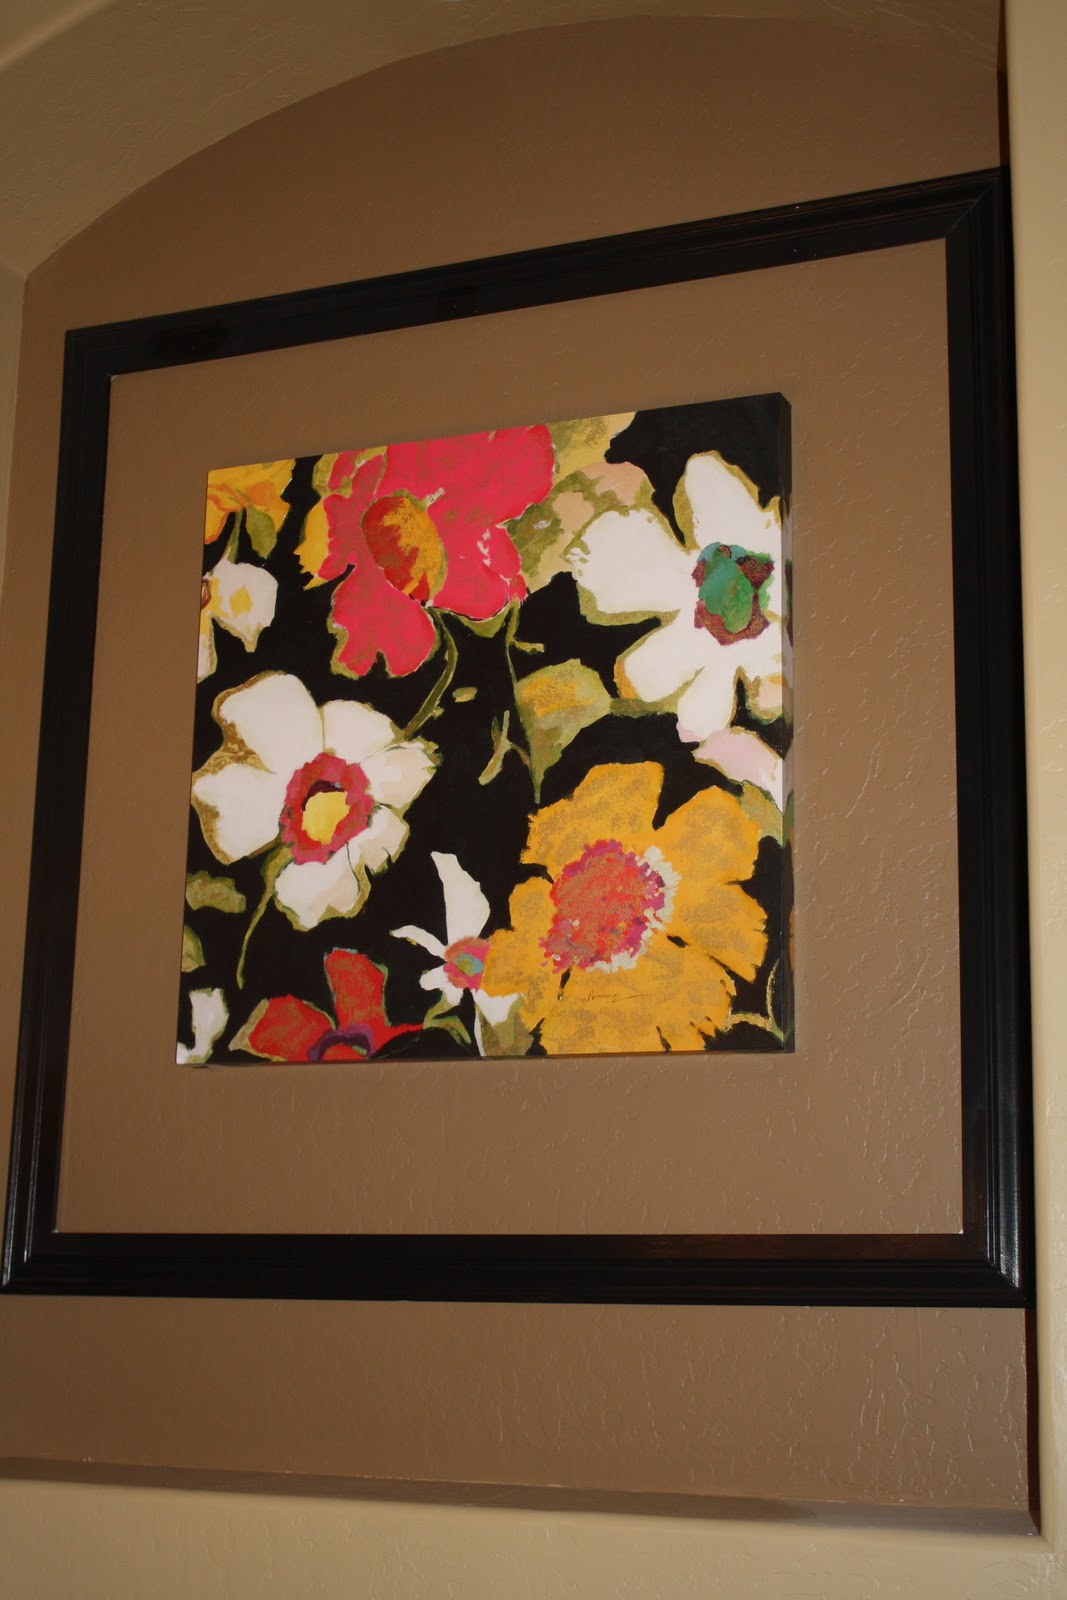
Then I passed up the picture nailed that on and Ta-Da! A perfect fit that finally fills that gorgeous spot!

View from the bottom

Do you have a spot that needs a grand picture to fill it up? Try building a frame around an existing photo to give it a larger feel!

Linking up at: Tatertots and Jello